Workflows
Knowledge Base | Workflows
Need a validation Workflow?
The below workflows can be used for different roles but if you are looking for specifically subscription pre-validation subscriptions, see /knowledge-base/workflows/request-workflow-type
Request Workflow Types are a series of curated workflows you can define and apply to specific subscriptions.
Workflows allow you to create steps at specific points.
You can find workflow under Admin Settings > Workflows
Login
Login Workflows occur immediately after Logging in was successful (before Registration steps / if any)
Two Factor Authentication (new device)This feature will check to see if this user has logged in from this browser before, if not and they have a valid mobile number, an SMS will be sent to them with a 5 digit number they will need to enter to continue.
Registration
Registration steps are checked every time a user logs in also, so you can add these retrospectively to collect information in the future too.
Validate Mobile
If the user provided a mobile number on registration, this step will ensure it is working and connected. A 5 digit number is sent to the mobile for the user to confirm they received it. They can change the mobile number if it is wrong.
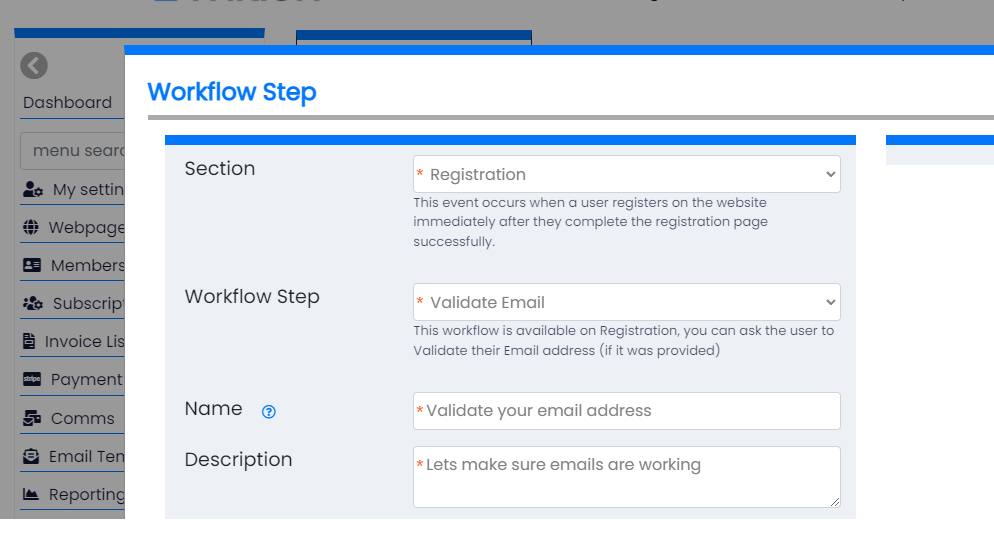
Validate Email
If the user provided an Email address on registration, this step will ensure it is working and connected. A 5 digit number is sent to the mobile for the user to confirm they received it. They can change the email address at this step if it is wrong.
Indigenous Status
If collecting statistics on Aboriginal and Torres Straight Islanders is important for Government funding or statistics, you can request the user add this as a registration step.
Corporate
Use this workflow as part of the subscription process to allow a user to register a corporate directly into the Supplier table and add this users relationship. Use a relationship with isOwner if you want them to be able to see other members who are joining as this organisation. You can configure the supplier type (e.g Customer, Corporate Sponsor), the relationship type this user has with the organisation (Employee, Admin) and the default status of the organisation (e.g. Active, Temporary).
This works very well with a Registration (Corporate) web component which you can allow these members to register and link with this supplier automatically on registration, say for example this organisation gets 100 free standard subscriptions, you can use the Registration (Corporate) web component to do that.
Important User Data
This workflow can be used in general as well as in Workflow Request Types (which can occur before subscription) to capture a specific field that is important, including custom fields: Full list
MobileNumber,Email,Indigenous,DateOfBirth,Gender,CustomField1,
CustomField2,CustomField3,CustomField4,CustomField5,
CustomField6,CustomField7,CustomField8,CustomField9,
CustomField10,CustomField11,CustomField12,CustomField13,
CustomField14,CustomField15,CustomField16,CustomField17,
CustomField18,CountryID,Timezone
Collect Address
This feature checks to see if the user has added a preferred address, if not it will ask for it. The user can optionally skip this step and will be reminded each time they login.
Collect Supplier
This feature will check for a specific relationship type with a specific supplier type and if the user does not have one setup, it will prompt to select one from a type ahead list. Example scenarios include:
- Asking a member to select the RETIREMENT VILLAGE where they live.
- Asking a Kindergarten staff member to select the Kindergarten they work at.
Generate New Member Number
This workflow owill set the USERNAME to the same as the USERID, making it a number by default. On setup we can set the next number to be the next number for your organisation (e.g 20000).
CreateSubscriptionInvoice > New Subscription Admin Fee
This workflow will create a once off fee for brand new subscriptions. Some organisations have an initial processing fee, for example $10 which is only applicable on the first payment, recurring subscriptions do not need this. In this workflow you not only set the fee amount, but you also pick the Geneneral Ledger code (it can also determine GST or NonGST and the system will calculate the GST for you or leave it out) and you can decide what the line item description will look like on the invoice.
Collect Education
The Collect Education workflow step requires users to provide at least one education record (Institution, Qualification, Start Date) during registration. When a qualification is submitted, the system automatically creates a verification task for staff, who must review and confirm the record before marking it as verified. Users can manage multiple qualifications under About Me → My Qualifications, while staff can view, add, or edit qualifications on a user’s account and are responsible for completing the verification tasks.
Form Checker
This workflow can ensure that a user has completed a specific form and if not presents the form to complete. Further add a check that a field has a specific value (like Staff Approved=Yes) etc for this workflow. There is also the ability to make sure it is recent with a date range check such as in the past week, in the past 4 months.
Collect Public Profile Preferences
When a user logs in, if they have not set their preferred public profile they are prompted to do so. This workflow prompts new users to select how they wish to appear in public directories (System, Email, Mobile, or Mobile & Email).
Auto assign to supplier based on email domain
This workflow will run after any user validates their email address (or performs a 2FA). It will look at the users email address e.g. someone@domaintesterxerx.com.au and extract the email domain (domaintesterxerx.com.au) - it will then look across specified suppliers (you can limit to just a specific type) and if found it will connect this user to the organisation as well as optionally add a subscription term price (we use the Discount Code / Reference Number from the Subscription Price record to match future versions of that subscription).
Staff Approval - this registration workflow only works inside a Request Workflow Type (for subscriptions etc), it can be a blocker for renewals or new subscriptions until staff approve it. This will create an AI Task for staff to review, if you turn this on make sure you setup an automated email to send AI Tasks (all or this specific ReferenceType "StaffApproval") to an email address to monitor them.
New Subscription Admin Fee
This workflow step is triggered when a new subscription is being purchased. It allows the organisation to attach an additional administrative fee (Subscription Admin Fee) before the subscription is finalised. This can be used to cover onboarding, processing, or compliance costs.
Renewal Subscription Admin Fee
This step runs during subscription renewals. Similar to the new subscription version, it allows an extra admin fee to be added when a user renews an existing subscription. It is commonly used for annual administrative costs or compliance overheads.
Donate to Foundation
This workflow step adds an optional or mandatory donation step during registration or subscription processes. The user can be prompted to contribute to a linked foundation or charity before they complete the workflow.
Donation on Subscription
This workflow step attaches a donation action to subscription purchases. It can automatically prompt or require the user to add a donation amount when buying a subscription. Typically used for organisations that run fundraising alongside membership or subscription revenue.
MemberData
Mail Chimp Integration
Under Admin Settings > Integrations > Mail Chimp, there is a holder to add a mail chimp API code. You can get this from Mail Chimp under (Profile > Extras >API Keys).
Once you add a Mail Chimp API, you can turn on the Mail Chimp Integration, anytime a member record is updated, either by staff or the member themselves, a call to Mail Chimp with the email address and first name and last name is performed. It is saved in the default list as a subscriber.
Like all other Workflows, you can turn this on for just specific role types, for example just for Members. So that other roles like staff and administrators are not sent to mail chimp.
Form
Forward Form to Email
This workflow allows you to send the contents of a FORM to a specific user, for example someone outside of your organisation or to a staff member to action. By default a Form will notify the owner that a new form was submitted, but only provides a link to the Form to see the data, this workflow helps alleviate the problem.
Create user from Form
If you use Forms to create leads, if you include the fields Firstname, Lastname, Email Address then you can use this workflow to create a user. It won't create the user if that email already exists. If the user does not exist it will create a basic user account. So once you receive the form, you can then easily send the user an email manually from the system.
Campaign Monitor (CreateSend)
Under Admin Settings > Integrations, there is a setting for a Campaign Monitor API.
Campaign Monitor API
Login to your CampaignMonitor account, click your name on the top right corner, then click on Account Settings then Api Keys, then click on Generate API key (or use the one already there) . Your Client ID is here too, but we don't need that for this integration.
ListID
In Mition you add Workflows for Campaign Monitor by going to Admin Settings > Workflows > Add New and selecting Edit User, you will then find a Campaign Monitor workflow as an option which will ask for a ListID, this is required in order to add users to a Campaign Monitor List, the workflow will maintain this Campaign Monitor list of users automatically. To get the List ID from Campaign Monitor, Login to your CampaignMonitor account and go to the List and Subscribers page and select the list you would like these members to be linked with and click on the name. On the left hand side is a "settings" button, click that. At the bottom you will find a List API ID. Put this ID in the Mition Workflow setting field called "Campaign Monitor List ID".
Testing
If you setup your list to integrate with any roles, then you can go and edit any user and see if it appears in the list. You can also create a new user and it will appear in your campaign manager list.
Roles
Like all other Workflows, you can turn this on for just specific role types, for example just for Members. So that other roles like staff and administrators are not sent to mail chimp.
Whenever a user is modified and it matches the roles (if selected) it will update the user based on the users status. You modify roles in the Workflow editor in Mition.
Scenarios:
Add Users
If the user is Active, not deleted, not hidden and not unsubscribed from bulk emails, this user is added to the subscription.
Remove Users
If the user is not Active, deleted, hidden the user is marked as deleted.
Unsubscribe Users
If the user is unsubscribed from bulk emails, the user is updated as unsubscribed.
Advanced:
What about existing members in this campaign list?
Mition will not remove or alter any of the existing users in the list, unless the email address matches, in which case it will manage these users for you.
Does it work both ways, what if someone unsubscribed from Campaign Monitor, will they automatically unsubscribe from Mition? No, this is a one way push to Campaign monitor. Once a user is unsubscribed in Campaign Monitor, mition will not automatically re-subscribe the user (as the user may have unsubscribed via Campaign Monitor and that needs to be respected).
Custom Fields
In your Subscription List in Campaign Monitor you can add additional fields. If you add either or both of these fields, they will be automatically populated by this mition integration:
Lastname
UserID
These are case sensitive, so you want to make sure they are exact. When you add these custom fields in Campaign Monitor, make sure you mark them as "visible".
Payments/Subscriptions
If a member choses not to renew their subscription, admin is alerted.
There is a workflow available to email staff member if an invoice is created or paid.
Auto renew button available.
If there are any other custom fields important to you, please let us know!
Workflow Point
Create Subscription Invoice
Workflows that run on Invoices directly after Subscriptions are created, these specialty workflows can add processing fees, calculate the fee based on a value in the supplier table, issue a per member fee for organisations based on number of members (usually in the members custom field 1 record).
Workflow Component: New Subscription Admin Fee (Pv2)
Purpose
This workflow automatically adds an administrative fee to invoices for new subscriptions only. It is often used to recover onboarding or processing costs when a member joins for the first time.
How it Works
- Runs on
CreateSubscriptionInvoice. - Only executes if the invoice: Belongs to a subscription that is not a renewal, and Has exactly 1 line item initially.
- Workflow will: Check if a configured fee amount is valid (> 0). Optionally restrict to certain subscription discount codes. Add a new line item for the admin fee with the correct GL code and GST calculation. Recalculate the invoice totals.
Workflow Fields
- Field1 (Decimal) → Fixed fee amount (e.g. 50.00).
- Field2 (Number) → GL Code ID for the fee. Must be a valid General Ledger Code in the system.
- Field3 (String) → Line item description (defaults to “Admin Fee” if blank).
- Field4 (String) → Subscription Discount Codes (comma-separated). Leave blank to apply to all.
Conditions
- Only applies to new subscriptions (
isRenewal = false). - Skips if: Fee amount is
0or not provided. Subscription discount code does not match configured list. GL Code does not exist. - Only executes if the invoice starts with a single line item.
Example Configuration
Workflow row:
FieldValueField150.00Field2101 (ID of GL code “Admin Fees”)Field3Onboarding FeeField4NEW2026
Example subscription:
- New corporate member signs up with discount code
NEW2026.
Resulting invoice:
- Original subscription fee line item.
- Line item:
Onboarding Fee— $50.00 (+ GST if applicable).
⚡ Notes:
- GST is calculated based on the chosen GL Code’s
GstNotApplicableflag. - If GL Code ID is invalid, the workflow will exit without adding the fee.
- This workflow won’t affect renewals, only first-time joins.
Workflow Component: Subscription Split Fee (Pv3)
Purpose
This workflow splits the subscription fee into two parts:
- Keeps the main subscription line item but reduces it by a specified amount.
- Adds a new line item for the split fee (e.g., an administration or levy fee).
It’s useful where part of a subscription needs to be allocated to a separate GL code or labelled differently for accounting purposes.
How it Works
- Runs on
CreateSubscriptionInvoice. - Only executes if the invoice: Belongs to a valid subscription, and Has exactly 1 line item initially.
- Workflow will: Validate the configured fee amount and GL Code. Optionally restrict to certain subscription discount codes. Create a new line item for the split fee, with the correct GL Code and GST calculation. Deduct the same amount (and GST, if applicable) from the original line item. Recalculate the invoice totals to ensure consistency.
Result: the total invoice remains the same, but revenue is distributed across two line items/GL accounts.
Workflow Fields
- Field1 (Decimal) → Split fee amount (e.g., 100.00).
- Field2 (Number) → GL Code ID for the split fee line item. Must exist in system GL Codes.
- Field3 (String) → Description for the split fee line item (defaults to “Split Fee” if blank).
- Field4 (String) → Subscription Discount Codes (comma-separated). Leave blank to apply to all.
Conditions
- Skips if: Fee amount is
0or not provided. Subscription discount code does not match configured list. GL Code does not exist. Invoice doesn’t have exactly one starting line item.
Example Configuration
Workflow row:
FieldValueField1100.00Field2202 (ID of GL code “Admin Levy”)Field3Regulatory LevyField4CORP2026
Example subscription:
- Base subscription invoice is $500 Membership Fee.
Resulting invoice:
- Adjusted line item:
Membership Fee→ $400 - New line item:
Regulatory Levy→ $100 - GST amounts also split accordingly.
- Total invoice remains $500.
⚡ Notes:
- Ensures the invoice total does not change, only redistributes amounts.
- GST handling: the workflow deducts GST from the first line item and adds it to the new split fee line item based on GL code rules.
- Ideal for compliance levies, insurance add-ons, or any portion of fees requiring separate GL reporting.
Workflow Component: Fee Per Member With Minimum (v1)
Purpose
This workflow ensures an organisation’s membership fee is calculated based on the number of members they manage, but never below the minimum subscription price.
Formula:
Invoice amount = MAX(Minimum Subscription Price, Fee per Member × Member Count)How it Works
- Runs on
CreateSubscriptionInvoice. - Only executes if the invoice: Belongs to a valid subscription, and Contains exactly 1 line item initially.
- Workflow will: Read the member count from
CustomField1on the user’s record (organisation’s total members). Multiply this by the configured Fee per Member (Field1). Compare the result with the existing line item amount (minimum subscription price). If the calculated fee is greater than the minimum (and the subscription is not prorated): Add a new line item with the calculated amount. Waive the original line item (set to $0 and append “(waived)” to description). Recalculate invoice totals.
Result: the organisation is charged based on their actual member count but protected by a minimum price floor.
Workflow Fields
- Field1 (Decimal) → Fee per member (e.g., 50.00).
- Field2 (String) → Subscription Discount Codes (comma-separated). Leave blank to apply to all.
Member Fields Used
- CustomField1 → Total number of members for this organisation. Must be set correctly for the workflow to work.
Conditions
- Skips if: No member count is defined in
CustomField1. Subscription discount code does not match configured list. Subscription is prorated (AutoProrata = true). - Only executes if the invoice starts with a single line item.
Example Configuration
Workflow row:
FieldValueField150.00 (per member)Field2CORP2026
Example organisation:
CustomField1 = 100(100 members).- Subscription minimum price = $2,500.
Resulting invoice:
- Calculated cost = 100 × $50 = $5,000.
- Since $5,000 > $2,500, workflow: Waives original line item (
Membership Fee (waived)). Adds new line item:Adjusted Membership Fee ($50.00 X 100)= $5,000.
⚡ Notes:
- Ensures fairness — larger organisations contribute proportionally more.
- Still protects smaller organisations with a minimum fee.
- If prorata billing is enabled, workflow will not adjust the invoice (per-member calculations don’t apply cleanly to partial terms).
📌 Fee Per Supplier Category (v1)
This workflow automatically adjusts membership invoices based on the Supplier’s category size.
How it works
- The workflow checks the Supplier linked to the invoice (
User.LastSupplierID → Supplier.ItemID and if that is blank it looks for the LinkedSupplierId on the Subscription). - It reads the Supplier’s CustomField1 value (e.g. Small, Medium, Large, Very Large).
- The workflow compares this value against a pricing table (defined below in JSON format).
- The invoice line item is then updated to the correct amount for that category.
- If the Supplier has no category, the workflow will use the
"Default"price from the JSON. - GST will be calculated automatically based on the Subscription Term’s GL Code settings.
Setup
- Configure Supplier Custom Field 1 Go to Suppliers → Custom Fields in admin. Set CustomField1 to type Dropdown. Add the following dropdown options:
Small Medium Large Very Large⚠️ The values must match exactly what is in your JSON pricing rules (case-sensitive). - Enter Pricing Rules In the workflow component setup, paste JSON into the Pricing Rules (Field1):
{ "Small": 500, "Medium": 2000, "Large": 4500, "Very Large": 6000, "Default": 6000 }You may adjust the values as needed."Default"is used if a Supplier has no category set or if the category doesn’t match. - Restrict to Subscription Discount Codes Enter one or more discount codes in Match Subscription Discount Codes (Field2), separated by commas. Example:
CORP2026Leave blank to apply to all subscription terms.
Example
- Supplier A → CustomField1 =
SmallWorkflow adjusts invoice line item to $500 (+GST if applicable). - Supplier B → CustomField1 =
LargeWorkflow adjusts invoice line item to $4,500 (+GST if applicable). - Supplier C → CustomField1 = blank Workflow applies the Default amount of $6,000.
Workflow Component: Rate adjust and Insurance Workflow (Pv1)
Purpose
This workflow adjusts subscription invoices by:
- Modifying the base membership line item using the member’s Full-Time Equivalent (FTE) status.
- Adding insurance-related line items for: GLI Premium (default insurance) Voluntary Insurance (optional, per unit) Spouse Insurance (optional, per unit)
It ensures members pay the correct fee for their working arrangement and selected insurance options.
How it Works
- Runs on
CreateSubscriptionInvoice. - Only executes if the invoice: Has a valid subscription, and Contains exactly 1 line item initially.
Steps:
- Base Line Item Adjustments If the member is marked GLI-only (CustomField9 = GLI/GLIM), the base membership fee is waived. If the member is on leave (MATLEAVE, LSLEAVE, etc.), their FTE (CustomField18) is reduced (0.5, 0.4, etc.). If
FTE < 1, the base membership fee and GST are multiplied by that factor, and the description is annotated. - Insurance Line Items GLI Premium: Added unless CustomField10 =
1(opt-out). Amount is calculated from WorkflowField1(fortnightly rate, default 11.95) and scaled to the subscription term (day/week/month/year). Voluntary Insurance: Added if CustomField16 (units) is between 1–5. Amount is calculated from WorkflowField2(fortnightly per unit, default 2.00), scaled to term, multiplied by units, with optional loading (CustomField14). Spouse Insurance: Added if CustomField17 (units) is between 1–5. Amount is calculated from WorkflowField3(fortnightly per unit, default 2.00), scaled to term, multiplied by units, with optional loading (CustomField15). - Each insurance line item is saved as a new invoice line item with the correct GL Code (Insurance or Voluntary Insurance, no GST).
Workflow Fields
- Field1 (Decimal) → Fortnightly GLI Premium amount (default 11.95).
- Field2 (Decimal) → Fortnightly Voluntary Insurance per unit (default 2.00).
- Field3 (Decimal) → Fortnightly Spouse Insurance per unit (default 2.00).
Member Custom Fields Used
- CustomField9 → Membership type override (GLI/Leave types).
- CustomField10 → GLI opt-out flag (1 = no GLI).
- CustomField14 → Voluntary Insurance loading multiplier.
- CustomField15 → Spouse Insurance loading multiplier.
- CustomField16 → Voluntary Insurance units (1–5).
- CustomField17 → Spouse Insurance units (1–5).
- CustomField18 → FTE multiplier (e.g. 1, 0.5, 0.2).
Example Configuration
Workflow JSON row:
FieldValueNameRate adjust and Insurance Workflow (Pv1)Field111.95Field22Field32
Example user:
CustomField18 = 0.5(part-time)CustomField16 = 2(two units voluntary insurance)CustomField17 = 1(one unit spouse insurance)
Resulting invoice:
- Base membership fee reduced by 50%.
- Line item: GLI Premium ($11.95 scaled to subscription term).
- Line item: Voluntary Insurance (2 × $2 scaled).
- Line item: Spouse Insurance (1 × $2 scaled).
⚡ Notes:
- Works only when the starting invoice has a single line item.
- GST is not applied to insurance GL Codes.
- Uses subscription term type (
day,week,month,year) to correctly annualise/scale rates.
Workflow Component: International Subscription Discount (v1)
Purpose
This workflow automatically applies a discount to subscriptions for members in lower-tier countries, helping ensure pricing is fair and regionally appropriate.
- Tier 2 countries receive a 25% discount.
- Tier 3 countries receive a 50% discount.
How it Works
- Runs on
CreateSubscriptionInvoice. - Only executes if the invoice: Belongs to a valid subscription, and Contains exactly 1 line item initially.
- Workflow will: Check the member’s country tier from their user record (
Tierfield). IfTier = 2→ apply a 25% discount line item. IfTier = 3→ apply a 50% discount line item. Add the discount as a negative line item (Country Discount) with the same GL Code as the main subscription fee. Recalculate invoice totals.
Result: the member’s invoice is automatically reduced by the discount amount.
Workflow Fields
- This workflow does not use configurable fields.
- Discount rates are fixed: 25% (Tier 2), 50% (Tier 3).
Member Fields Used
- Tier → an integer on the user record:
1 = Full price(no discount).2 = Tier 2 country(25% discount).3 = Tier 3 country(50% discount).
Conditions
- Skips if: Invoice does not have exactly one line item. User tier is null or equals
1(full price). - Discount is applied even for renewals.
Example
Member from a Tier 3 country signs up for a subscription worth $400.
Resulting invoice:
- Line item:
Membership Fee→ $400 - Line item:
Country Discount→ -$200 - Invoice total = $200
⚡ Notes:
- The discount line item inherits the same GL Code as the main subscription fee.
- GST is calculated on the discount using GL Code rules (already negative if discount).
- If you need to change discount rates or add more tiers, a new workflow version should be created.
